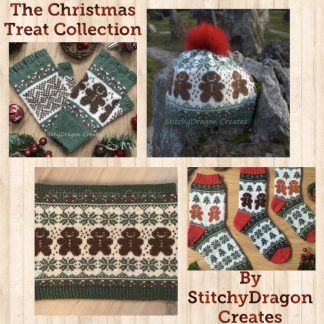
How to make a Latvian Braid
Latvian braids look spectacular and difficult, but their secret is that they are created by purling alternate colours and intentionally twisting the two strands. Whilst in most colorwork we keep our floats hidden at the back of our work and our yarns set in relation to each other (one float on top, one below) in the Latvian braid our floats take center stage and twisting the two colors together at the front of your knitting produces “arrows” either facing to the left or the right.
Your yarns will get very tangled by the end of round 1 but do not untwist the two strands, round 2 is worked in the opposite direction and, upon completion of that round, your strands will have completely untangled themselves!

Set up round
Join CC leaving a 6” (15cm) tail, *K1 CC, k1 MC; repeat from * to end.
Bring both strands to the front between LH and RH needles.
Round 1:
*P1 CC, bring MC strand under CC strand (twisting yarns), p1 MC, bring CC strand under MC strand (twisting yarns); repeat from * to end.
Round 2:
Bring CC strand under MC strand (twisting yarns), p1 CC.
Now change direction and *bring MC strand over CC strand (twisting yarns),
p1 MC, bring CC strand over MC strand (twisting yarns),
p1 CC; repeat from * to end finishing with a p1 MC in the last stitch of the round.
Your Latvian braid is complete! Work the next round as directed in the pattern you are following.
These instructions produce a braid with the “arrows” pointing to the right, to make left pointing arrows you simply reverse the twist. i.e., on round 1 instead of bringing the strand under you take it over, and on round 2 instead of bringing the strand over you take it under.
When your project is finished there are a few short steps that will make your braid look perfect.
Finishing: At this point the join where each round starts and finishes is noticeable, but this is easily minimised.
 Thread a darning needle with a short length of MC, bring it up as shown above, and down where the needle is inserted
 That’s much better!
Now all that is missing is the white “bar”. Thread your joining tail of CC onto darning needle and make the “bar” as shown above
 Fasten off and weave in ends (above).
Copyright © 2023 StitchyDragonCreates