How to Reinforce a Steek
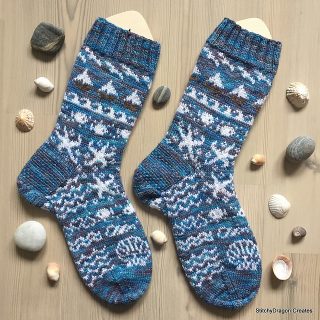
This is a technique which terrifies a lot of knitters. After all, what sane person takes scissors to their knitting?! But there are many occasions when it is much easier, or more convienent, to knit a tube and then open at least part of it. True afterthought heels, v-necks (especially in colorwork), and cardigan fronts are just a few places where this comes in handy and, once you have done a couple of steeks, you will find they really aren’t so scary after all!
A steek consists of some additional stitches positioned where we want to cut our tube after we finish knitting it. These extra stitches are used to secure the edges of the knitted rows either side of a central column where we will make the actual cut. By alternating the color of the steek stitches we can mark this column clearly so that we cut straight up the one column. None of these extra steek stitches will be visible from the front of your project once you’re finished.
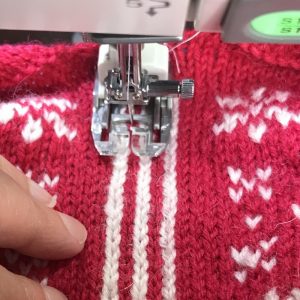
There are various different ways to reinforce the edge of a steek but my favorite is with a sewing machine.
- Set your machine to sew a straight stitch with a length of about 2-2.5mm
- Use thread that contrasts with the color of your knitting so it’s easier to see (remember this is not going to be visible from the front once you’re finished).
- If you are worried about the knitting getting caught on the sewing machine feed dogs you can put tissue paper under the knitting. Tear this away after each line of stitching is completed.
- Use a walking foot on your sewing machine (if you have one)
- Reduce the foot pressure on your machine a little (if you can)
The last two are not deal breakers, they just help the knitting go more smoothly under the machine foot.
Now your machine is all set up there is just one thing to remember:
Do not stretch or pull your knitting through the machine or you will end up with a ruffled edge, just let your machine feed dogs do the work themselves.
Let’s get started. In the following pictures there are 5 columns of steek stitches (3 white, 2 red), we will number them 1-5 from left to right.
 Step 1
Secure your thread by sewing a few stitches back and forth a couple of times.
 Step 2
Sew down the left-hand edge of the 2nd column of steek stitches (shown here in red).
 Step 3
When you reach the end of your knitting go back and forth a couple of times to secure your thread.
Step 4
Repeat steps 1 to 3, sewing a second line down the right-hand edge of the 2nd column.
 Step 5
Repeat steps 1 to 4 down each edge of the 4th column (shown here in red).
 On the reverse of your knitting, you can see the 4 lines you have sewn.
 Using a sharp pair of scissors cut down the center of the 3rd (middle) column shown here in white.
Copyright © 2023 StitchyDragonCreates